
Welcome to my day of the FALL BLOG HOP hosted by Sheri at Sunshine in the Attic.

Below is the schedule of other bloggers in the hop:
September 19th Sheri -- Sunshine in the Attic
September 20th Maggie -- Maggie's Empty Nest Days
September 21st Susie -- Susie's Sun Room
September 23rd Yevette -- Evindie
September 26th Patricia -- Quilting Lines
Do pop over check out what they made, as for me?
I have a fixation with the Five Little Pumpkins Song. It's been part of my teaching repertoire for many, many years. So here is my latest rendition I am calling it Five Happy Pumpkins.

It's really easy to do, it does involve some applique but it's as easy as "cut and paste!"

Updates in yellow!

These squares started out at 3 inches. Draw a diagonal across from corner to corner sew 1/4 inch on either side of the line, cut ON the line and press open. Trim to 2 1/2 inches.

Sew "fence posts" to center red piece (2 1/2 by 8 1/2) as pictured below. Then sew together three background pieces. The bottom of the fence measures 16" x 4 1/2".

For the pumpkins, Cut squares in the sizes 12, 10, 8, 6, and 5 inches. Mark the outline of the fabric with tape for a cutting guide for the size of your pumpkin. Cut as close to the tape as you can,leaving about 1 inch margin.


You can add light webbing to "stick" the white to orange. I also opted to blanket stitch and add "pumpkin lines" stitches to keep it down if all the webbing was too thick!


I pressed then blanket stitched
and embellished, in that order, until all five were done. Gotta have JOY in the journey!!


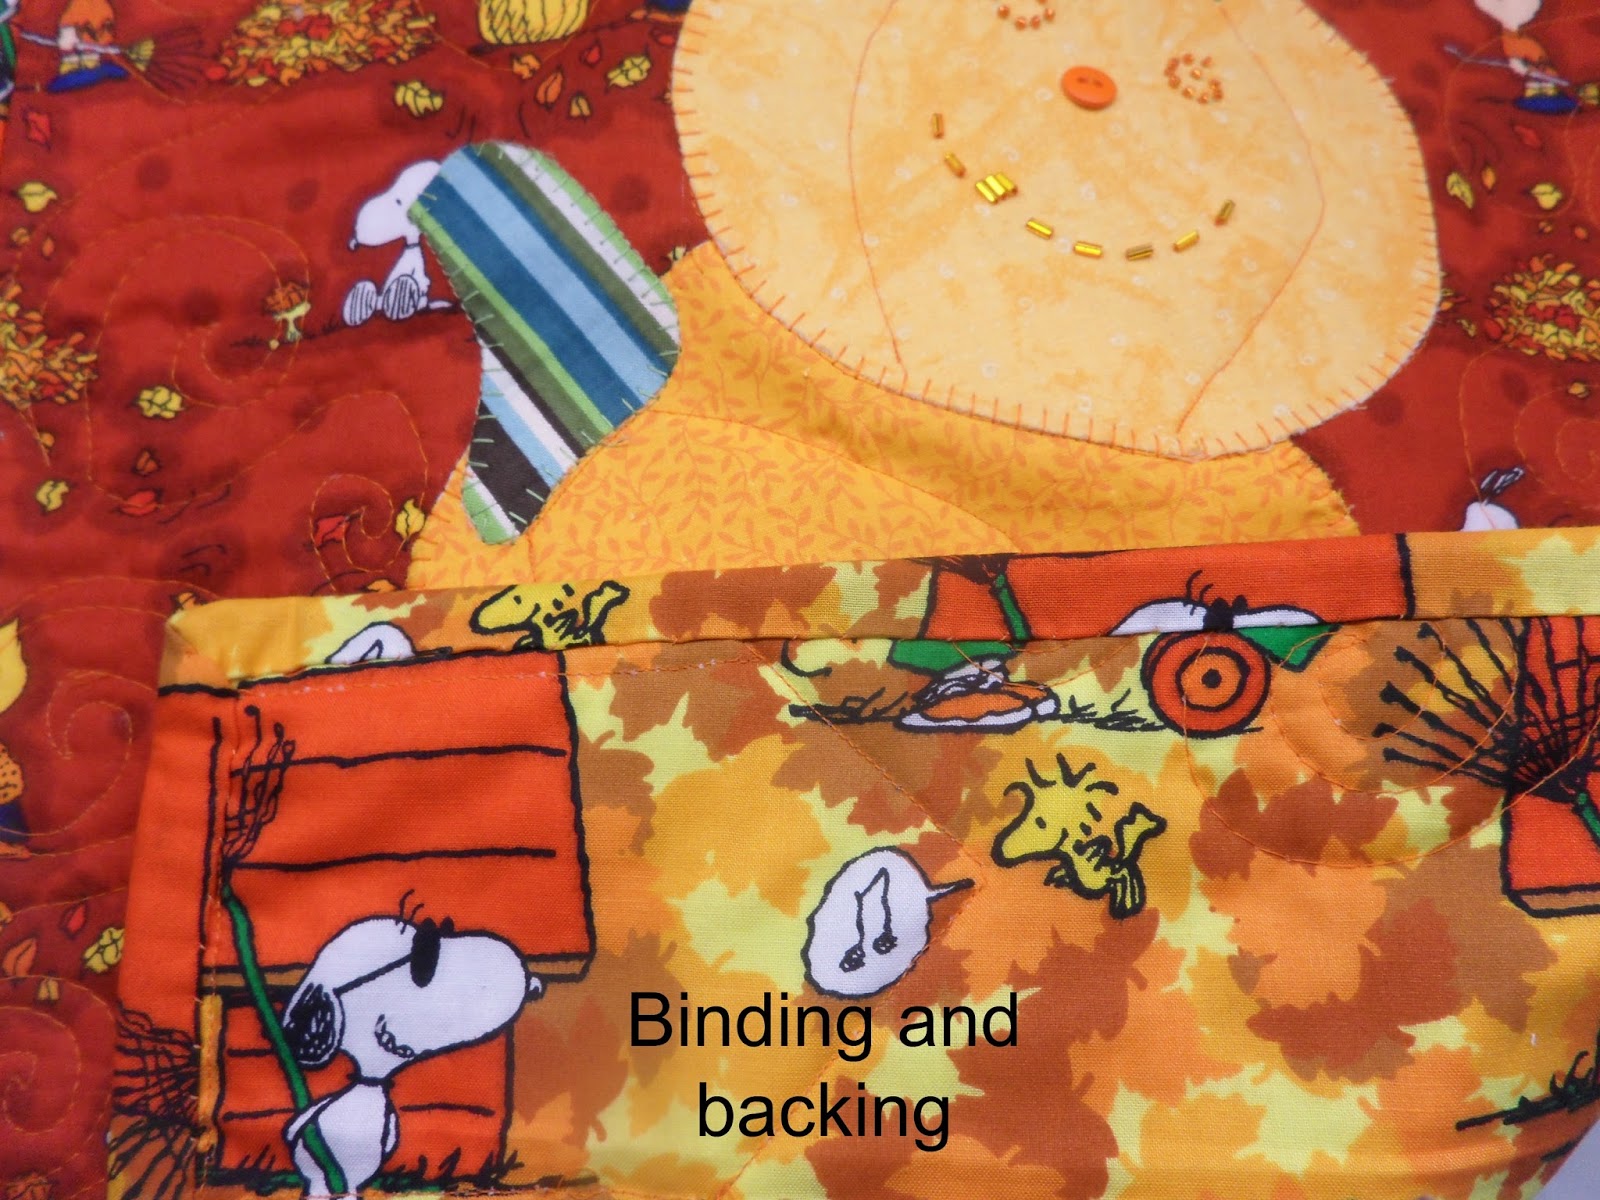
I love the Peanuts gang, and Charlie Brown so I chose that for the background so something is going on behind the pumpkins! And I also used another fabric with Peanuts for the back.

Five little pumpkins sitting on a gate

The first one said "Oh my it's getting late!"
The Second one said "There's a frost in the air."

The third one said "But we don't care!"

The fourth one said "Let's run and run and run!"

The fifth one said "I'm ready for some fun!!"
"Whoosh" went the wind and "OUT!!" went the light
and the Five Little Pumpkins rolled out of sight!

Finished size: 30" by 16" (roughly)
Thank you for the darling project and great tutorial! I really love that little song and it's so fun that you included in with your tutorial!
ReplyDeleteThis is adorable. I don't know the song as it is not one we have in England.
ReplyDeleteThanks for the tute--but it does need a little 'tweaking'. Your size for the larger fence fabric is not correct (should be 17 1/2" x 4 1/2" ?) and you don't say to fuse the pumpkin squares to fusible before cutting circles.
ReplyDeleteCute project! I had forgotten that little song. Good job on the tute too!
ReplyDeleteSo very cute! And that "5 Little Pumpkins" diddy was one of my favorites when I was teaching preschool! You really made it come to life!
ReplyDeleteYour wall hanging is very cute! I love your Peanuts background and backing too! Thanks for the tutorial.
ReplyDeleteThat is a fun and cute wall hanging. I don't know the Five Little Pumpkins song so thanks for the introduction. I have the same fabric you used (also a big Peanuts Gang fan) so I want to make this.
ReplyDeleteThanks for this adorable wall hanging pattern and for the tutorial! It is so cute to make each pumpkin embellished differently! I love how you used beads and buttons, too!
ReplyDeleteSusie
this is such a lovely wall-hanging, love your pumpkins!
ReplyDeleteOH How cute your wall hanging is! I really love it. I like that you have added beads and things to it for an extra special touch. Love the background fabric, too.
ReplyDeleteI have never heard the Pumpkin song, but it is really cute, too. Thank you so much for sharing.
Totally cute!
ReplyDeleteSew cute! Thanks for all the photos of how you made this ... :) Pat
ReplyDeleteThat's so cute! I like the Peanuts fabrics that you used. After all it is the time for The Great Pumpkin!
ReplyDeleteLove the quilt. I really like to see new projects or older techniques displayed in new ways to spark my interest. Thanks so much for sharing.
ReplyDeleteThat is fantastic! I love your interpretation of the ditty, thank you so much for the smile!
ReplyDelete~Brandy
Very cute wall hanging. Love the snoopy fabric too.
ReplyDelete