
Making these ornaments was really therapeutic, especially when I started adding the beads for bling. I'm going back to jazz up the plain ones, just for fun. That'll make them sparkle more when they are on the Christmas tree. Why didn't I think of that before?
This tutorial is for the sewing version and the gluing "child friendly" version.
You can scroll up or down to see whichever version you prefer.
For either version you will need:
A sheet of red felt (craft store felt is fine)
A red pipe cleaner (a large one folded or two- 4 inch pieces)
An 8-10 inch length of ribbon for hanging
Some fiber fill for stuffing (or scraps!)
And large googly eyes about 1/2 or 5/8 inch.
Glue
Scissors
Floss or thread for embellishing with beads
wire cutters (optional)

For Child Friendly Version you'll need glue!

Here are some glue options that may work for you, see what you have on hand.
1. Glue Gun: quick drying, great adhesion but too hot for kids!
2. Tacky Glue can wash away, I think it's too hard to squeeze
3. Fabri-Tac: a little expensive (they have smaller bottles) Consistency of rubber cement, adheres like hot glue, dries fast, has lots of "glue strings" We used this one for gluing the shape closed.
4. No-Sew glue. This is used for basting, great for holding things together until you sew, don't know if has lasting adhesion, will wash away.
5. Craft bond fabric and paper glue. Feels like Elmers, works with fabric, not supposed to wash away.
We used this one to glue the beads.
I know we are not going to wash these, but I always think "humidity" is enough to unstick something, at least down here in Florida!!
How to:

1. Pin the template to the felt. (My daughter is 11)

2. Trace a 1/2 inch line around template, this is your cutting line.

3. Cut on the line to cut out the crab shape. This is your margin of error so you can trim as needed later. Separate the two pieces so you can start applying the glue.

4. Mark the bottom piece with pins. This is the area that will be left open for stuffing.

5. Start on the right pin (if your are right handed) applying glue on the line to a section at a time. Attach top piece of crab and glue together as you go.

6. When you get between the claws, add the pipe-cleaner after you apply glue. You can either insert 2 cut pieces( about 4 inches long) or the large piece folded (you will cut it to size later)

Just keep gluing...

7. Continue gluing around until you get to the other pin.

8. Does neatness count? Yes! I cut red felt circles the size of googly eyes, to sandwich the pipe cleaner so it doesn't look sloppy on the back.

9. Apply glue on felt circle, attach pipe cleaner and put the googly eye on the front and squeeze!

10. Gently stuff the crab, just to make him squishy, not fat!

11. Use a stick to push some fiber-fil in the arms and claws. If the sides come "unglued," just re-glue and press the pieces together.

12. Lastly, apply glue to open area, placing hanging ribbon well past the glue line and press together. You may feel wetness because of the glue, it'll dry!!

13. We used Craft Bond for the beads. We had a tweezer but you can use your fingers. I found it to be faster.

Since it shows white it was easy for gluing the beads for the kids.

Once the beads are on, walk away and let it dry, trim as necessary.
It'll look much better the next day!

Tada! One happy Crab ornament.
SEWING Version:

1. Mark your opening on the crab for stuffing, don't sew closed, yet! : )
2. If you feel more comfortable following a line, you can trace a 1/2 inch line around the template and use the edge of your sewing foot on this line to sew around the crab shape.
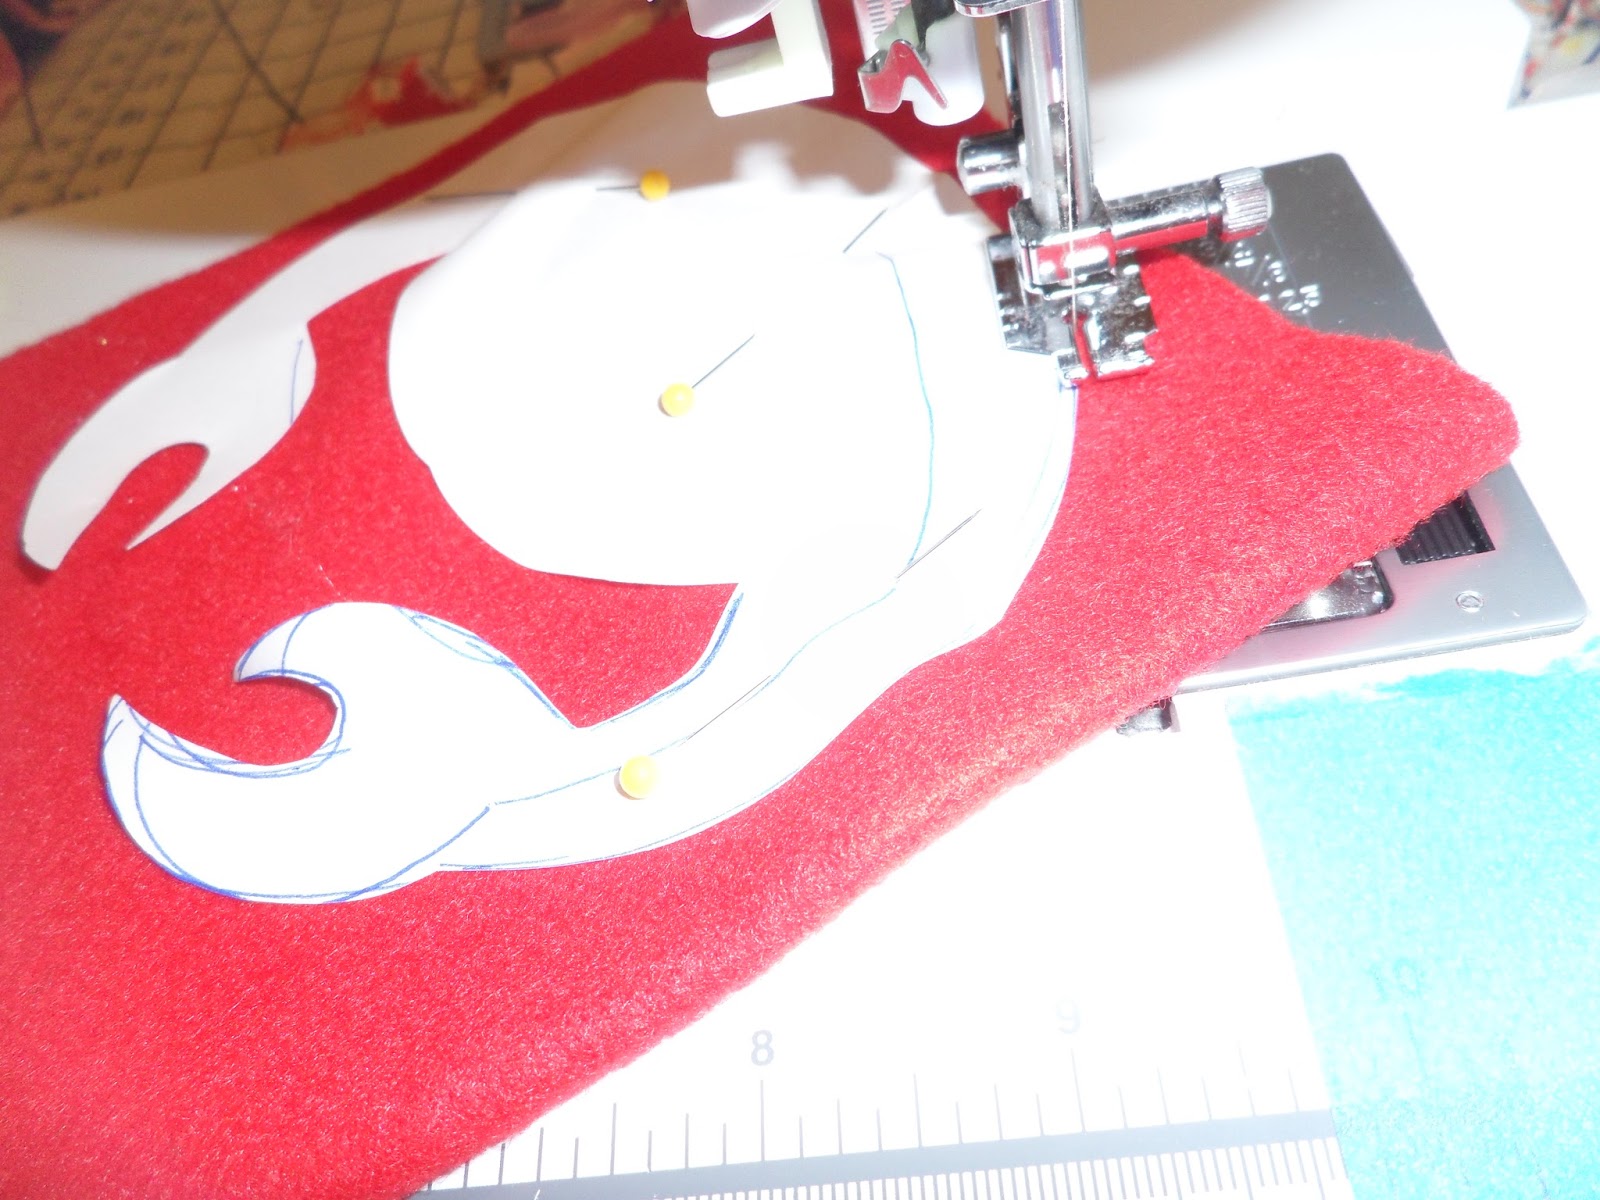

3. I pinned the template to the felt and just sewed around the actual template.
4. When I got to the claw part, I inserted the pipe-cleaner between the felt sheets and sewed right over it.

5. Pretty stitched crab shape.

6. Cut 1/4 to 1/2 inch line around the crab stitch line. Be careful when cutting where the pipe cleaner is you'll have to cut one layer at a time so you don't cut the pipe cleaner in the wrong place.

7. Cut the pipe cleaner to size about 2 inches long for extended eyes. (Scissors will work but not your GOOD ones!!)

8. Make sure you cut felt circles the same size as eyes to sandwich the pipe cleaner between eyes and felt circles, neatness counts!
9. Stuff gently and sew closed pacing hanging ribbon inside before stitching.
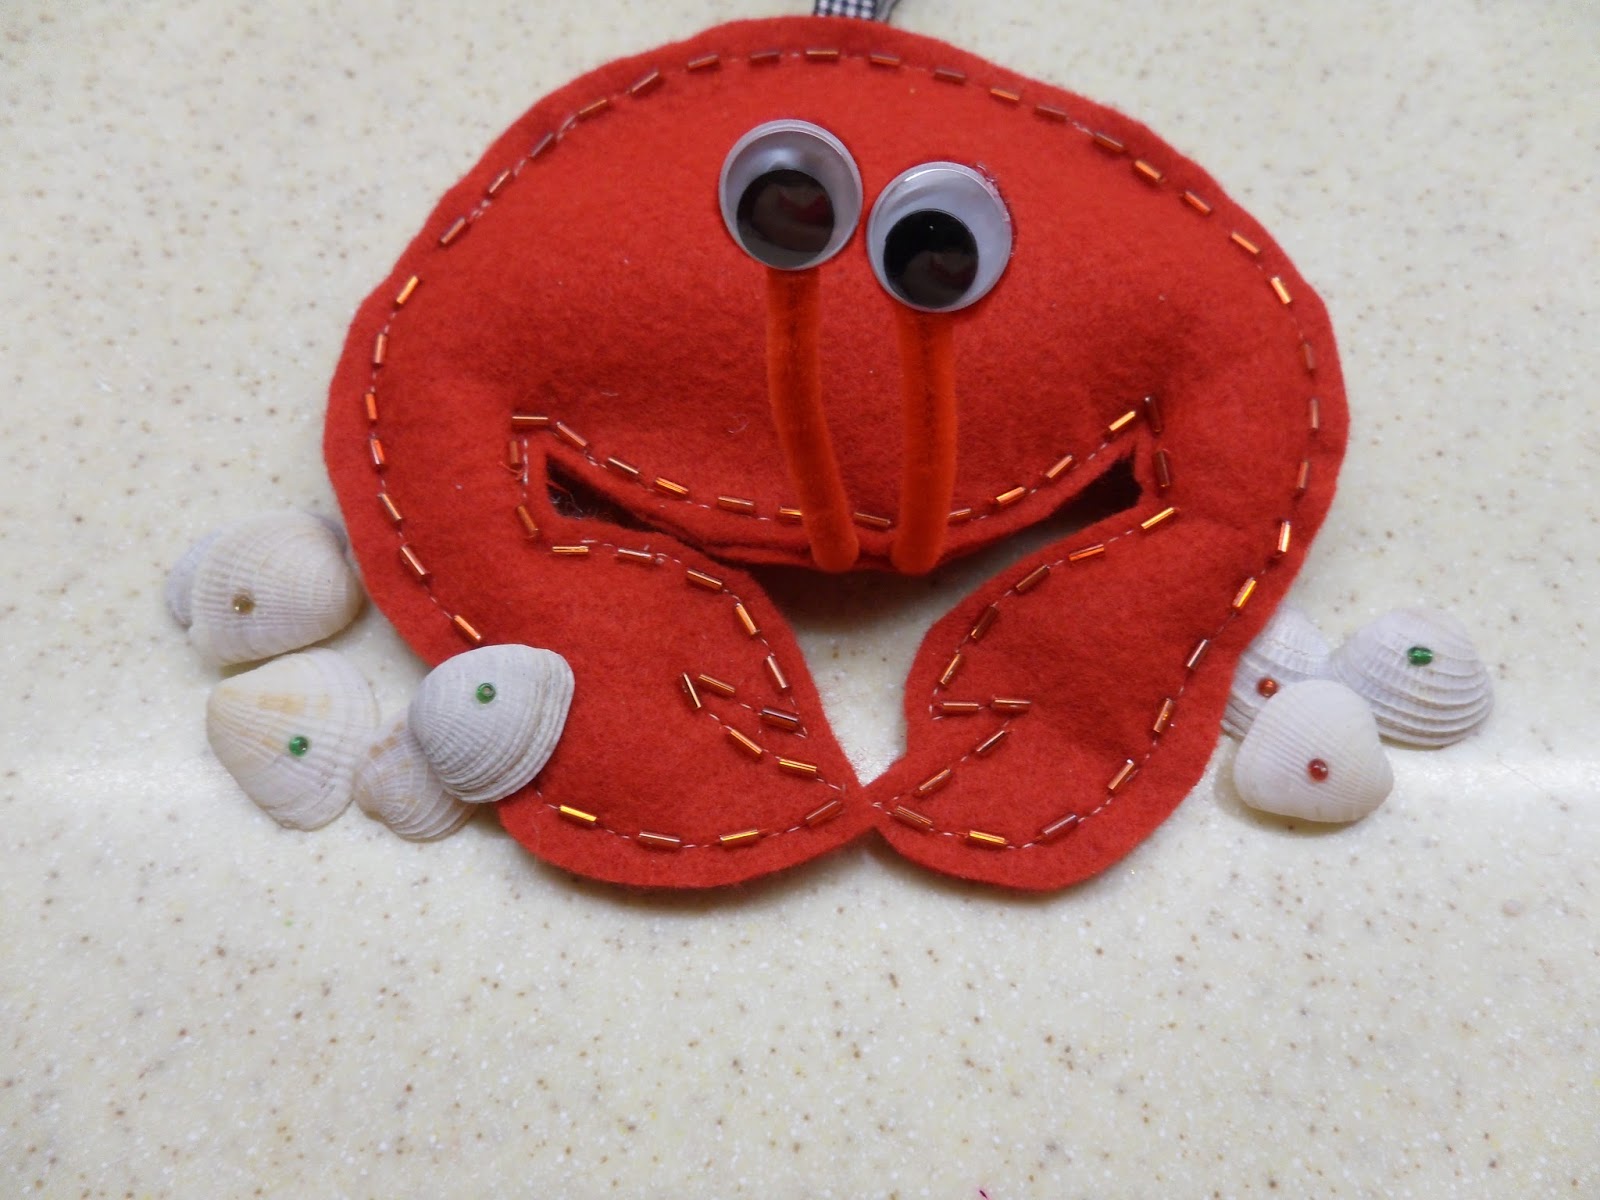
10. After stitching is complete, I hand stitched bugle beads every 1/8-1/4 inch apart, right over the stitching line.
And just for coming back I have included the crab template here for you!
Should I open a Flickr group for felt ornaments? I'd love to see yours!!
Comments
Post a Comment
Everyone enjoys a fitting reply; it is wonderful to say the right thing at the right time! Proverbs 15:23. I"m all ears!