
The Love Note

There are several options when publishing a blog post. I can either give you the whole scoop at once, or give you bits and pieces and update as I go. Unfortunately, (or fortunately) I have had to do the latter.  And although I can't get my hands on it soon enough, my mind is working on this project at almost every spare thought!


For my love note square,


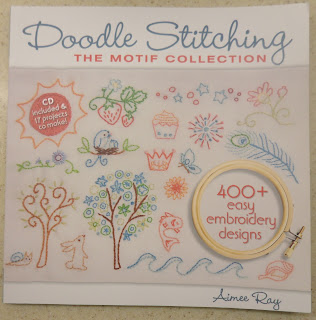
 I pulled out this embrodery book I bought in December of 2011.  I think it's important to learn things formally and correctly in order for the result to be its absolute best.
 
 
I am ashamed to admit that before, I really hadn't looked through it thoroughly.
 
 
Not only does it have a "how to" section with various types of stitching, (which I am eager to learn)


but it also has themed pages with samples and templates.

 
It also has projects that you can do

 
and a CD that lets you resize, combine and print the templates and patterns to trace or transfer onto the stitching area.
 
In case you were wondering, I got the itch to stitch after seeing such loveliness on this blog especially here and here and you have to look here!


 (sorry the lighting in these photos is poor)
 
Ready to stitch! I am still debating the design. Do I want fancy stitches for each letter or do I want the message to be the focus? I could also add some beading to the embroidery. So many possiblities.... I may just keep it simple since it's my first attempt. 
 
 
 Here goes!


Comments

  1. I must admit, I'm terrible about reading instructions! I'm such a visual learner and I don't have patience for most 'manuals'. I'm looking forward to seeing what you come up with.

    Thanks so much for stopping by my blog Elaine! Can't wait to see your new kitchen too! (((Hugs)))

    ReplyDelete
  2. Actually I enjoy seeing projects as they are being made, and knowing the story behind them. Such a coincidence...I'm getting ready to order that book! It looks like fun, and you're off to a great start with that beautiful background for stitching.

    ReplyDelete
  3. I like seeing the progress of projects too. It builds up the momentum and makes it more real. I can't wait to see your embroidery. I don't do much embroidery myself but it adds so much to a project! Maybe I should get that book too?

    ReplyDelete

Post a Comment

Everyone enjoys a fitting reply; it is wonderful to say the right thing at the right time! Proverbs 15:23. I"m all ears!

Popular posts from this blog

Christmas in July - "All I want for Christmas" Wall Hanging

It's here! The Christmas in July Blog Hop has started and I am stop #3 on the hop, so make sure you see what Amy and The Patchsmith have made so far.     I love a charm pack, it's a tiny sampler of a great fabric collection! I'd like to show you how to make this whimsical door or wall hanging for Christmas, it's an easy pattern to repeat with any Charm Pack.      What you will need besides fabric, sewing machine & thread! 1 Charms Square pack 2 Fat Quarters that coordinate with your charms and applique graphic Backing Fabric Lite Seam to Seam for applique (2-3 sheets) or whatever other fusible product you like Embellishments like buttons, Rick Rack or ribbon (depending on your project) Neutral (white) 2 1/2" strips for borders (4)   The  finished size is about 12" x 36" unless you add more sashing or borders.     The first thing you do is unwrap your charms pack and lay out all the squares. You will i

Friday Night Block Party: Pinwheels

Welcome to the Friday Night Block Party here at Summercrafter.  If  you missed the first one , don't worry there's another one today!  Every Friday I will be featuring a new quilt block and the name or names associated with it and a little history.         Today's featured block is the called the Pinwheel. (It's on the button above!) I love it because it means fun! It makes me think of ...       Ferris wheels     and cartwheels  and wind. The Pinwheel block, was created in the United States around the 1800's. It became a very popular quilt block pattern and continues to be used in a variety of styles. There are so many ways to accent the "blades" with the colors (light/dark) patterns and placement, both within and around a quilt.  And it's really not a difficult block to do, I'll show you three different kinds of pinwheel blocks to try. Look at mine. I was happy go lucky as I pieced all these pinwheel blo

Five Happy Pumpkins!

Welcome to my day of the FALL BLOG HOP hosted by Sheri at Sunshine in the Attic . Below is the schedule of other bloggers in the hop: September 19th  Sheri --  Sunshine in the Attic  September 20th Maggie --  Maggie's Empty Nest Days September 21st Susie --  Susie's Sun Room September 22nd Celine  -- Espritpatch   September 23rd  Yevette --  Evindie September 24th Judy --  Judy's Fabric Addiction  September 25th  Elaine -- Summercrafter   September 26th Patricia --  Quilting Lines Do pop over check out what they made, as for me? I have a  fixation with the Five Little Pumpkins Song.  It's been part of my teaching repertoire for many, many years.  So here is my latest rendition I am calling it Five Happy Pumpkins. It's really easy to do, it does involve some applique but it's as easy as "cut and paste!"   Updates in yellow! These squares started out at 3 inches. Draw a diagonal across from co