
Welcome to the Friday Night Block Party! I always wanted to live in a neighborhood that had block parties, but I lived in a cul-de-sac where people only made U-turns! But I have decided to make my own Block Party right here on the blog! We'll be here every Friday and you can even be a host if you want. Just shoot me an email. But for now, let's get this party started!

I am going to be showcasing some great quilt blocks in this feature with some back stories. This is a good way to become more familiar with the history of quilting and the blocks, read a blurb here. And of course, making samples is a great hands-on experience. Join me won't you?
You could share the same block, which would be nice, but a Block Party is a Block Party! So just add your link to feature any block that you are working on whether it's paper or fabric. I am asking however, that you please add new and different blocks for the parties, not the same one every week.
The first block I am going to feature is the simple Nine Patch block. The basic ideas is splitting up the block into nine sections.
The most basic is this one. Made up of 9 squares. It can be any size you like and it's easy to adapt.

This one is 6 inches square and made up of (9) 2 inch squares. (2 1/2" with seam allowances)
But a nine patch doesn't have to be just plain squares. It just has to be nine sections to make the block. So each "square" or section can have any number of designs or sub-designs to make the whole block.
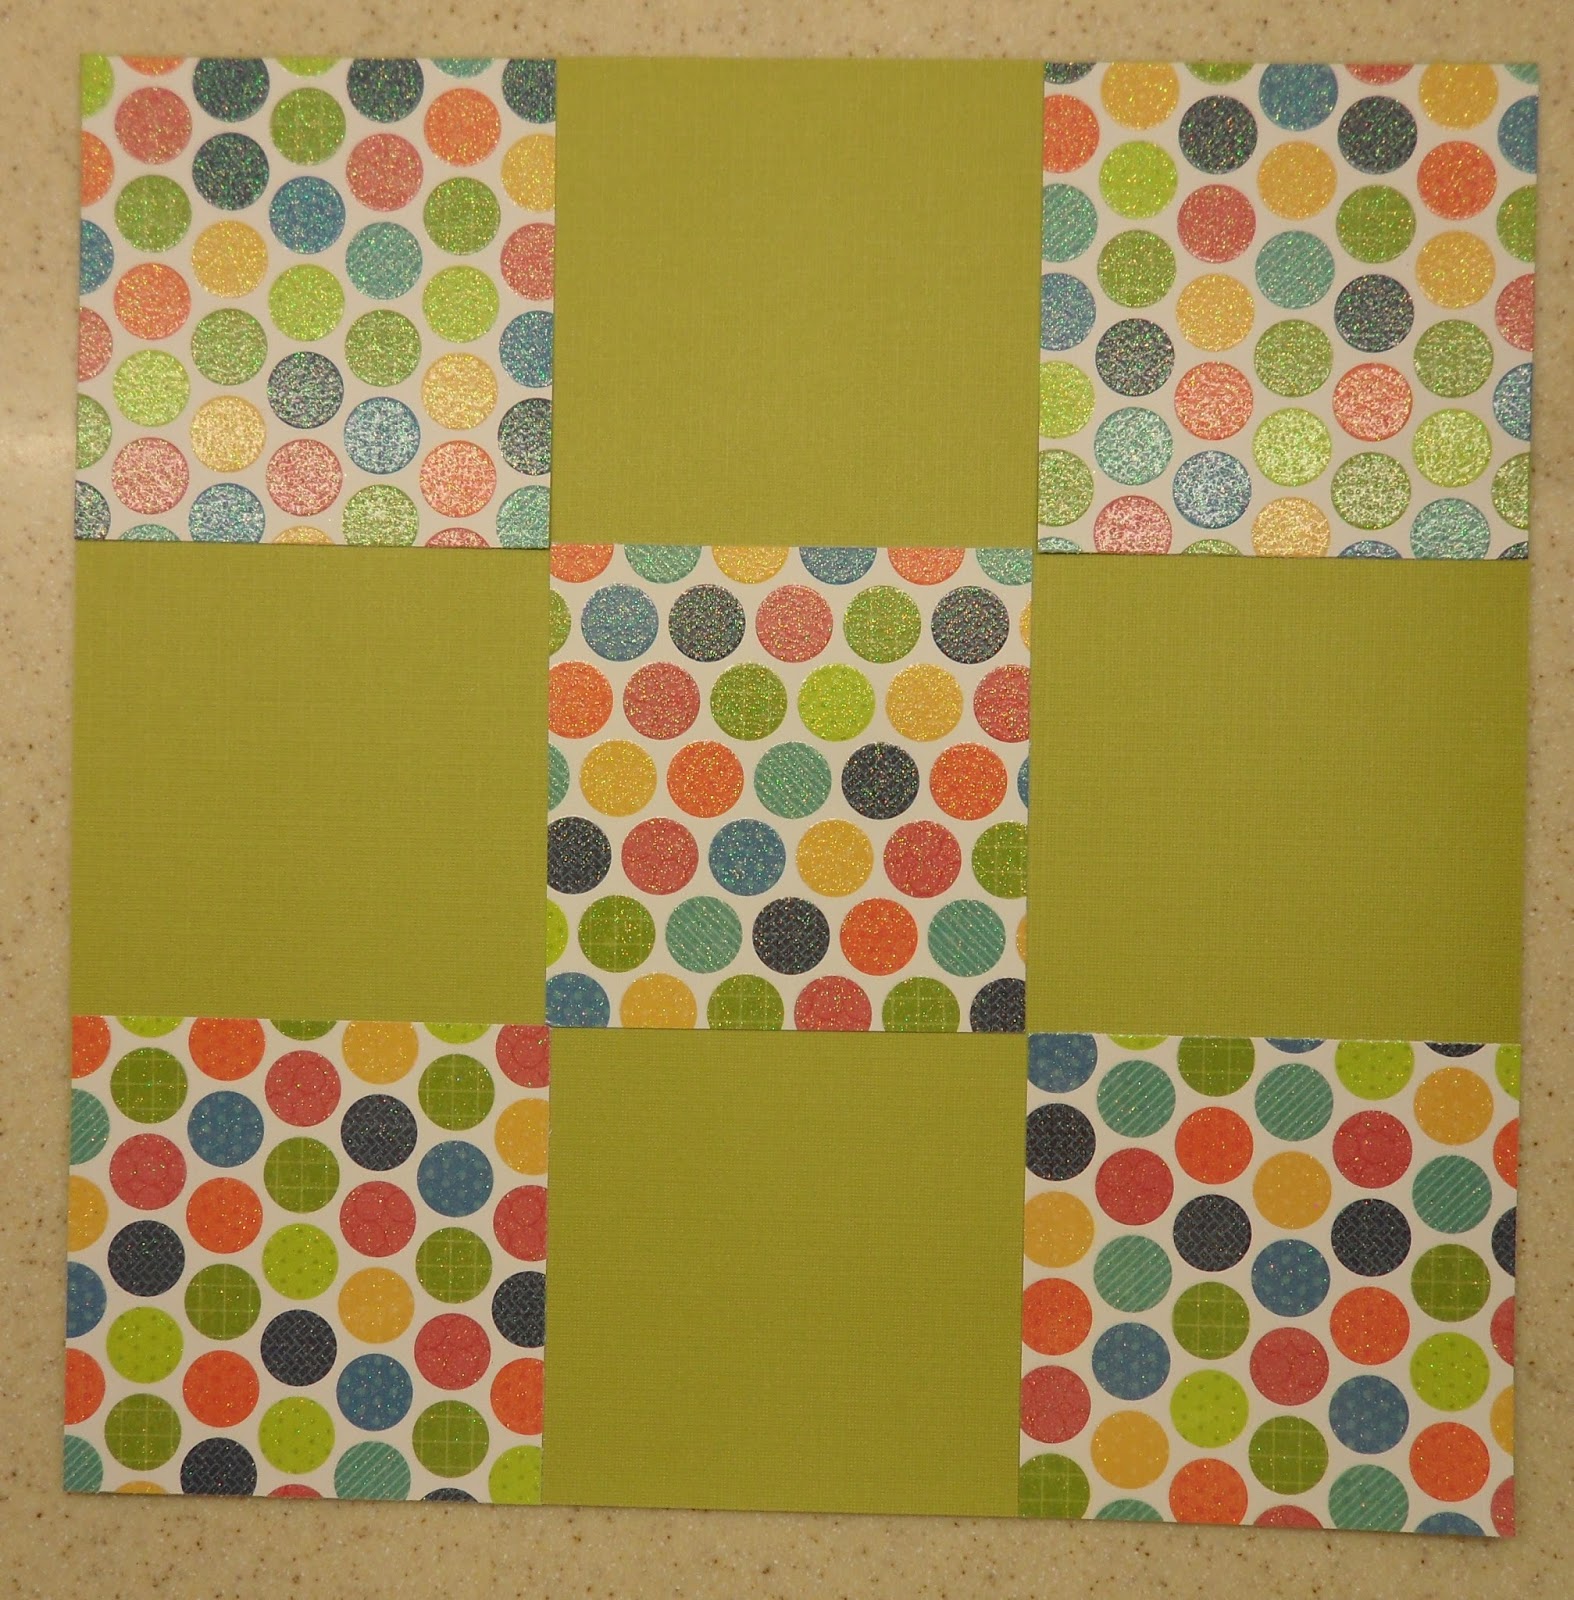
For example this block draft is made with nine half square triangles.

You can almost see a basket shape yet it was made with 9 "squares" that had their own design. So really you can make it as hard or as easy as you want.
Another nine patch design is the Churn Dash, can you see the nine sections?
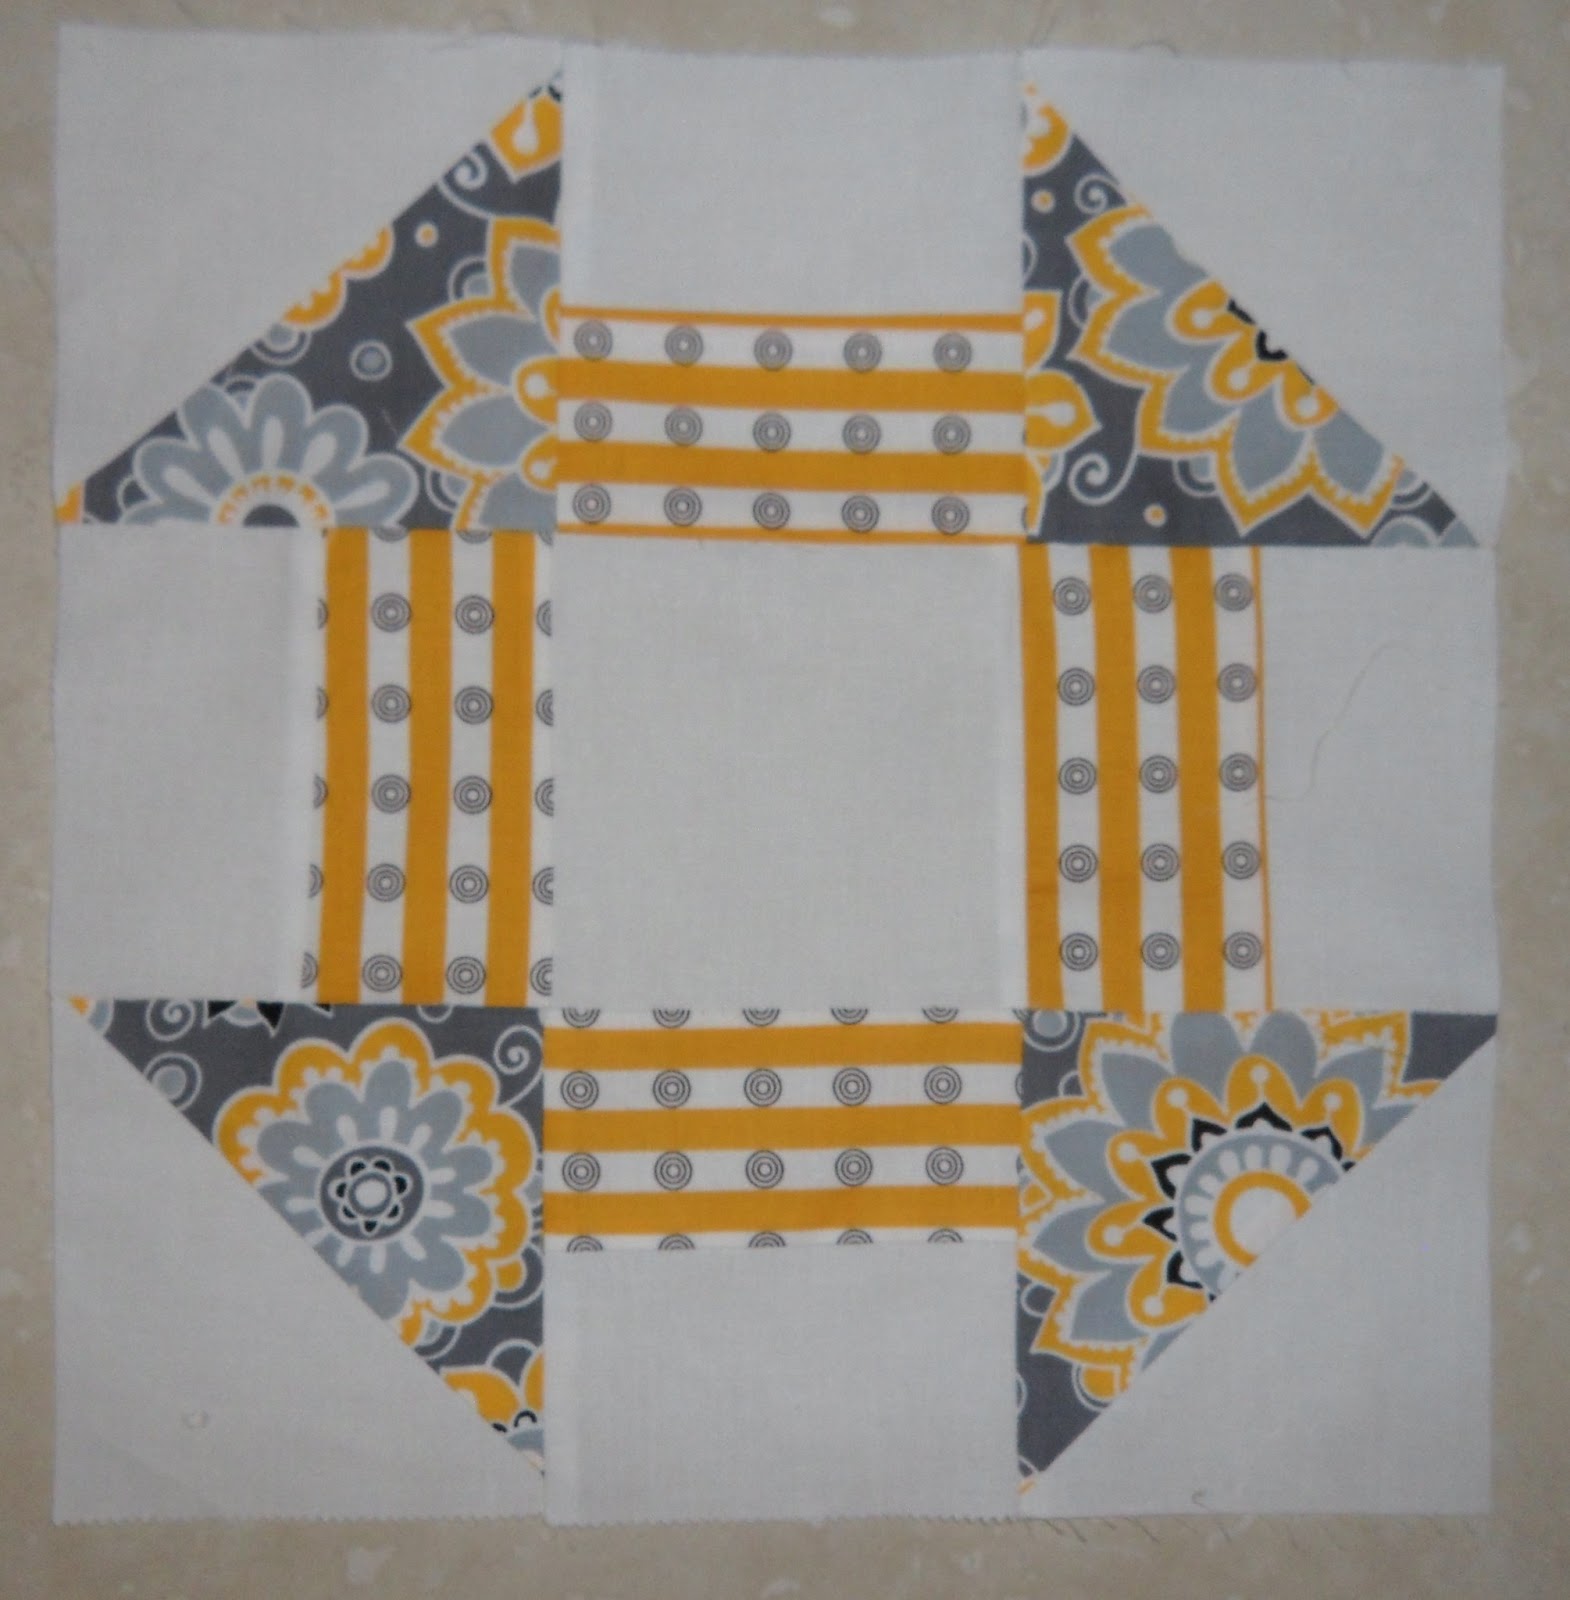
Look here to see the variety of other nine patch blocks. The nine patch can get very complicated as you can see on that link, as not all nine sections have to be identical.
The good old fashioned nine patch is really fun to make though. When you see the square take shape with all the different fabrics, it can be downright addictive! This is how you do it.
Start with 2 1/2 inch squares.

Choose fabrics or papers you like to look at, don't worry if they don't "match!"

Use paper if you don't want to use fabric, it's a great design for scrapbooking! A 12" x 12" cardstock is the perfect size! Use the main paper as part of the design and coordinate that color with a print.

Use a paper cutter to make 4"x 4" inch squares, cutting a column down the 4 inch mark then across at the 4 inch mark. You only need four or five squares per sheet depending on your layout!


You can arrange the squares so you don't get the same fabric next to or touching another one. See on this scrapbook page you can put pictures and captions in the squares, so easy!
You can also play with the light/dark hues of colors to get what I like to call the "Purina" version which is checkered.
Once they're arranged how you like them, just start sewing/gluing the squares together until you get as many blocks as you want.


For a MEGA Nine Patch Project, check out the "Niner" pattern by Camille Roskelley at Thimble Blossoms. I'll be giving one of these patterns away to one lucky participant. Just add the link to your block below. If you don't have a link, then leave a comment. This Giveaway closes on August 15th at 11:55pm Eastern Time.
UPDATE ON THE GIVEAWAY!!! Camille Roskelley has generously offered any 2 of her patterns to the lucky winner, your choice! So invite your friends and their friends to the party!! Winner will be announced on August 16th post. How cool is that?
UPDATE ON THE GIVEAWAY!!! Camille Roskelley has generously offered any 2 of her patterns to the lucky winner, your choice! So invite your friends and their friends to the party!! Winner will be announced on August 16th post. How cool is that?

Check them out at her shop, Thimble Blossoms.
So just join in the fun with any block if you must, even if it's with paper. The only requirement is that you include the name of the block. Maybe we'll even make up our own names while we are at it! So, what are you waiting for? Add your link below. And don't forget to grab the button on the top right hand side! It's the block party you won't want to miss!
This giveaway is closed.
I am a new quilter and this was a great post. I checked out the block library ... what a wonderful resource. Thanks!
ReplyDeleteI love your block party, Elaine! I'll be featuring it on my next Sew Thankful Sunday post! Great idea!
ReplyDeleteI love the colors your chose for your 9 patch block. I have come to appreciate the basic blocks and the wonderful diversity of quilts and projects that can be made from them! Thanks for having Friday night block parties which will be something to look forward to each week!
ReplyDeleteI would like to join in on the fun! I love what I see here and can't wait till next Friday to see the block chosen
ReplyDeletethanks for the linky party!
ReplyDeleteNice scrappy nine patch quilt.
ReplyDeleteThis is awesome!!
ReplyDeleteI've just discovered about the block party and would really like to join!!! Too late for block number one, will do my best to be in time for number two! Great idea!
ReplyDelete