
I have struggled with the dilemma of big prints, little prints vs. large pieces, small pieces there must be a rule, but I have made my own. With some fabric, especially if they are not my favorites, I say cut them small let the colors play out! Sometimes there is a beautiful pattern or design that I hate to cut , so I try to use it a way that will show it off the best. This calls for making a particular piece larger for that design. Occasionally, the whole collection is fabulous and whatever you do comes out beautiful. YAY!!
 The current fabric collection I am working with for this new project is Dr. Seuss by Robert Kaufman. If you know anything about the books, they can be hard to follow sometimes in terms of plot and are a doozy for comprehension but great for phonics! Similarly, the fabric is loaded with busy colors, action and patterns and is quite an eyeful. I have seen several interestingly designed Dr. Seuss quilts and I wonder why some people cut these fabrics so teeny tiny then sew the pieces together multiplying the busy-ness? I think this makes for a dizzy quilt, but that is my opinion on style.

After much pondering and figuring and designing, I decided that, because these fabrics are so loaded with energy, I find that a simpler layout shows it in a way that makes it less distracting, yet still fun and Dr. Seussish.


It measures about 36" by 44" 1 square (rectangular) yard.


As a consolation for the delay in the quilt finish, I made this matching baby tooth pillow.


Each block is about 16 inches (4 to make the windmill)
After much pondering and figuring and designing, I decided that, because these fabrics are so loaded with energy, I find that a simpler layout shows it in a way that makes it less distracting, yet still fun and Dr. Seussish.

So for this baby quilt, I am using a Jumbo sized block pattern that showcases the fabric but isn't so crazy for an infant to stare at, perfect for a nursery. I was really excited because I hadn't seen any ONE GIANT BLOCK quilts anywhere. Here I am, thinking I am on to something and can make a living, right? or enjoy myself while making a living, lol! Well, I just saw on Camille's post about her new book that she has a giant block in it, (can't wait to get it) I really admire her so I won't fuss, (there is nothing new under the sun) and I didn't copy (I'm a librarian, copyright issues!) because I didn't see it until after I made mine and it's a different block. So we're good.

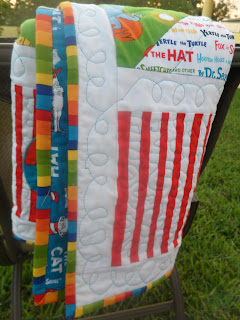
I have complemented the sides with simple white borders and used classic Dr. Seuss stripes for the name banner. All over stippling around and across the name.

Another perk is that because the block size is huge, it saves so much time cutting and piecing for the quilter (me). Yet still offers all the basic design elements of a much loved quilt.

Putting it together and quilting it has been a doozy, only because my shoulder is not behaving. So I had to just rest the arm for a week from the sewing machine. Life happens!! I just did straight quilting coming out from the center of the "windmill" block.

Since I am a teacher and a mother, one of my favorite aspects, and one of my pet peeves in piecing was that all the words be right side up (and read left to right) so there will be no reading confusion for this baby. LOL! You can see that below.

Loopy and quirky quilting around the main block.

I really agonized over which print to use for the binding (around the edge), so much so, that I put it completely out of my mind until I needed it. Then, in a split second the choice was totally obvious! Use the rainbow to tie in all the colors of the block.


It measures about 36" by 44" 1 square (rectangular) yard.
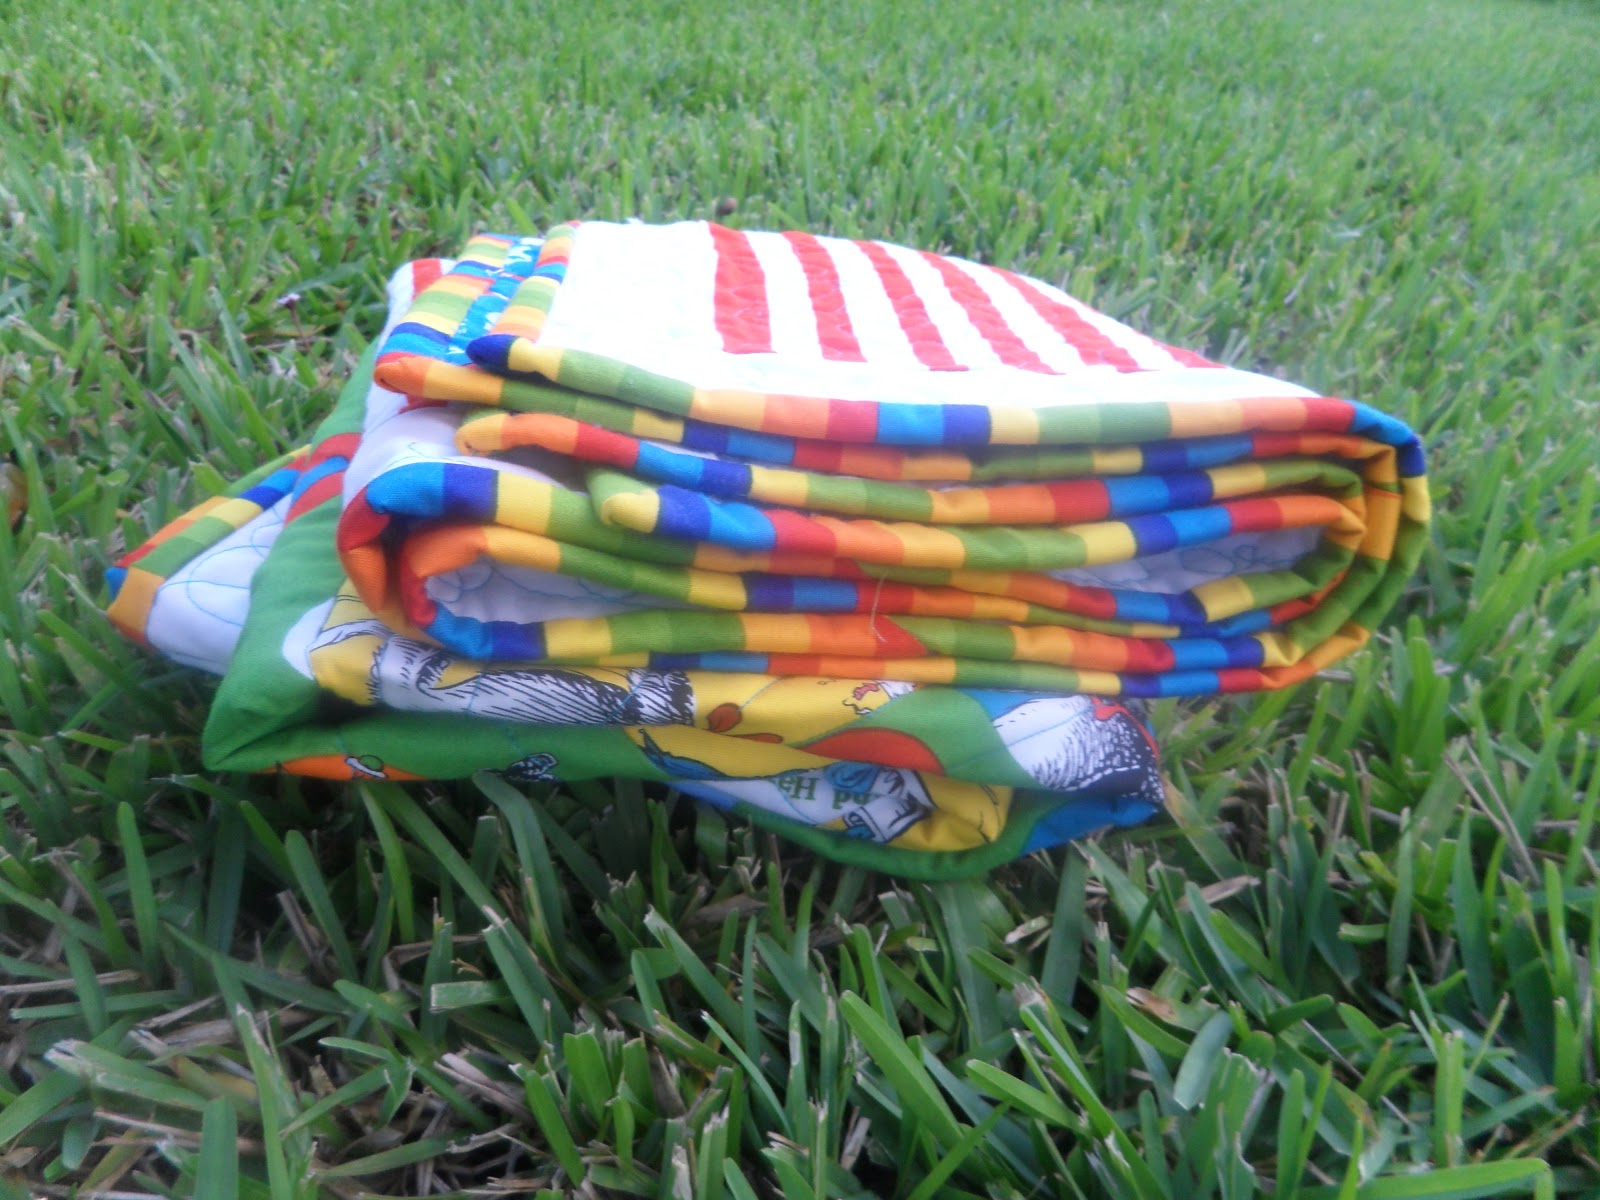


As a consolation for the delay in the quilt finish, I made this matching baby tooth pillow.


Congratulations Jen!!!
Hey, jump over here to check out more baby quilts, I've joined the fun too!
I love the fabric with the book titles!
ReplyDeleteElaine - this is truly a terrific quilt, and I love hearing all the details about how you chose your fabrics and why...perfect choices! I love the right-side-up words, and most especially that fabulous binding!!! A++++
ReplyDeleteI love it Elaine! That's for making it for my wonderful friend Jennifer and her new beautiful baby boy! Can't wait to give it to her. Thank you for all the hard work!
ReplyDeleteFrom your sister, Miralys
Elaine,
ReplyDeleteThe quilt is gorgeous and I love the pillow! I cannot wait for Baby Mason to us them! Thank you so much for all your hard work.
Jen